
Here are the video processes of my latest fan art project!
To summarize what these are for. I made these fan art because I’m a big Blizzard fan. I wanted a glamour/action type of full body portrait that would go well as a poster on my wall. I also wanted full body shots because I wanted to design their armor myself, staying close to the original but still giving it a lot of personal touches.
This is going to be my longest post so I’ll try to divide it into categories:
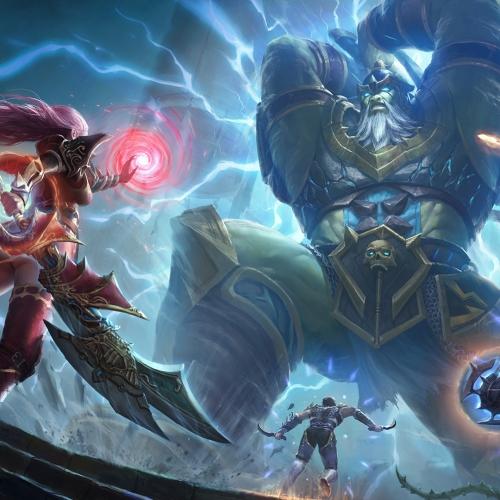
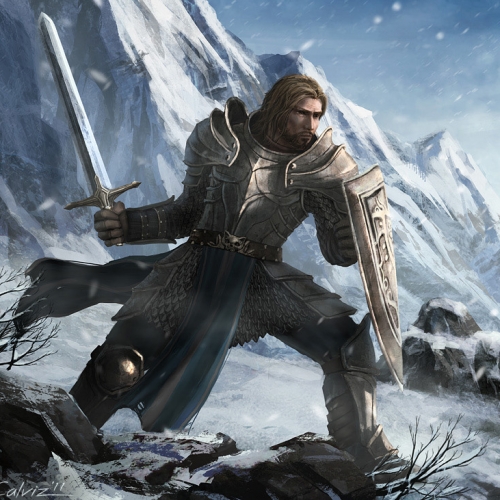
#1 Barbarian
For this one, I actually love the twist of how they depicted that barbarian as an extremely buffed old man who spins around with his attacks like a ballerina.
WARNING: Lots of half naked muscle-ly dudes flashing from time to time!
******************************************************************************
SOME NOTES AND STUFF I LEARNED:
-This piece was the first one I did. It was actually inspired by Michael Kutche’s Viking illustration which has a similar composition with two enemies framing the hero. Anyway, I initially did this for the contest (where I didn’t place) but then this also later inspired me to push creating the set of d3 fan art.
-As you can see in the video, I started out with a TERRIBLE colored sketch which I’m quite ashamed of. After blocking of the character and elements I thought I had a good grasp as to where the final look is heading but I was dead wrong. What happened was that I started coloring it without even knowing what kind of armor he’s wearing or what kind of expression he’s showing. This used up a ton of time for revisions AGAIN and AGAIN. I should have started color at a later time after I had sketched out the armor and pose which I did after failing again at my 2nd piece.
-To be completely honest, I am still the least satisfied with the pose in this piece. I tried acting his pose again and again in the mirror and I looked at tons of references and even resorted to using DAZ3D to help me with the pose. A lot of people would surely get disappointed knowing that I “cheated” with a 3D program. I will admit that I still have a ton to learn about anatomy and posing BUT my logic for doing this was that given my abilities and time constraint for this piece, I figured that instead of shooting myself with studio lights, which was difficult, why not just pose a 3D model and use it as reference? The problem that this would bring is the dependency on 3D. This just showed me my weakness dead on and gave me more reason to practice anatomy. Also, 3D models are not reliable because they were made through an eye of another artist which will be stylized and also muscle tension doesn’t work like in real life. So just a reminder to you guys and to myself… STUDY ANATOMY! NO EXCUSES!
******************************************************************************
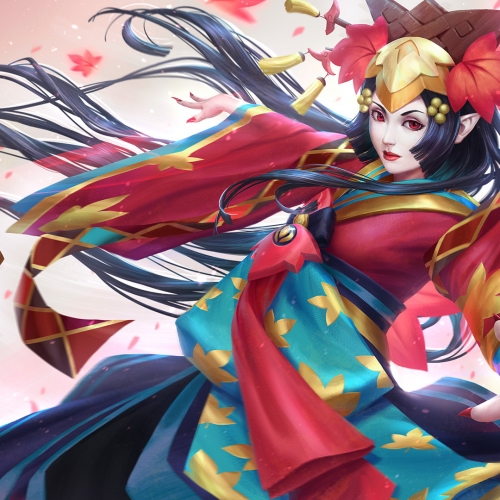
#2 Wizard
The twist of this class that I liked is how the wizard is portrayed by a young arrogant Asian female instead of the stereotype wise old man.
WARNING: Don’t judge me based on the references I used!
******************************************************************************
SOME NOTES AND STUFF I LEARNED:
-This was the second piece I did. I did this simultaneously with the barbarian piece. This also meant that all the MISTAKES I had with the barbarian piece was REPEATED in this piece. I also didn’t block in enough details before coloring. I also WASTED a LOT of TIME revising the armor and the face. And again, I resorted to correcting my pose with the help of a 3D program. I also didn’t plan enough and just added the skeleton enemies at the last part. So as a reminder, if you are doing an illustration or even a concept art, study study study and PLAN PLAN PLAN before jumping and coloring everything! (Sure it’s also ok to start with colors if you are doing works that are more spontaneous and have more emotion but for stuff like these, PLAN first!)
-Doing bricks was too tedious so in cases like these, it’s perfectly fine to use photos that you paint over BUT be sure you are not stealing from anybody! -I enjoyed designing the armor on this one because I strayed away from the original designs more than the other pieces.
******************************************************************************
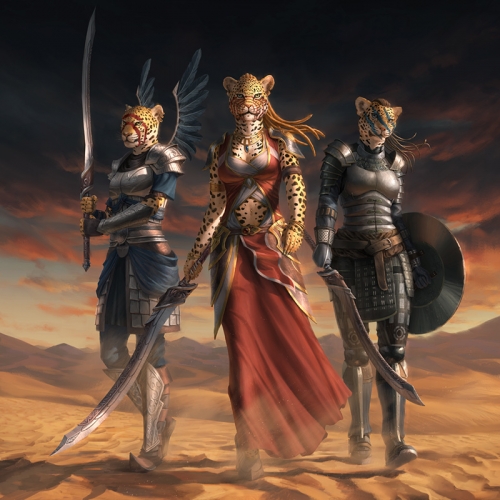
#3 Monk
The design twist I liked was the addition a long beard and the katars to a monk.
******************************************************************************
SOME NOTES AND STUFF I LEARNED:
-This was the 3rd illustration I did of the set. After failing hard for two consecutive times with the barbarian and wizard illustration, I decided to take the blocking in stage more seriously. I realized that my idols like Luvisi and Algenpfleger both started with strong line art before coloring. I decided to do a similar approach which helped speed up my colored a lot!
-Doing a lot of humans in a scene is VERY difficult because it’s easier to see anatomy errors than say from dragons or monsters. I underestimated this part a lot but it was out of my comfort zone so it was all good.
-Use guide lines to help yourself with the perspective. LEVENTEP’s brushes have perspective guides.
-For the monk’s pose, I looked at a lot of martial arts photos and I used the kneaded eraser on my desk to get the pose right. For the final fine tweaking, I decided to recreate the pose in 3D and it helped me fix the perspective of the torso and the leg at the back.
-Painting scenes with strong sunlight is very fun but is very hard compared to a night scene. Layout out the right colors at the start is more critical also.
******************************************************************************
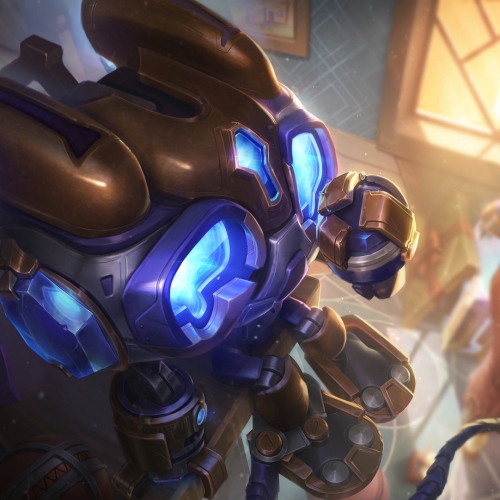
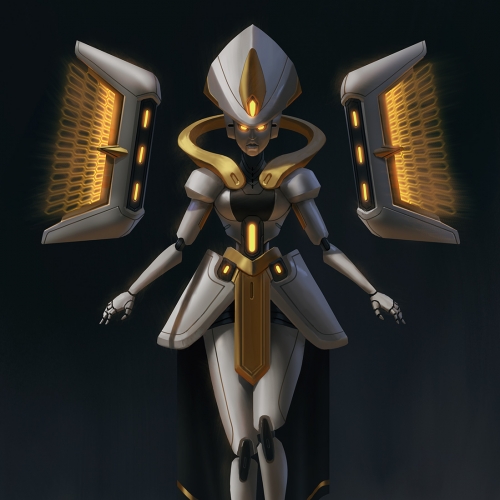
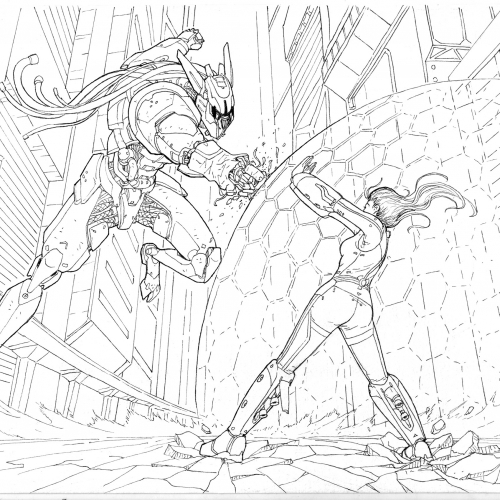
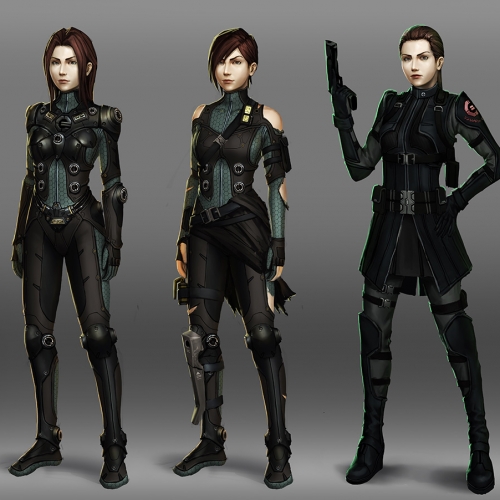
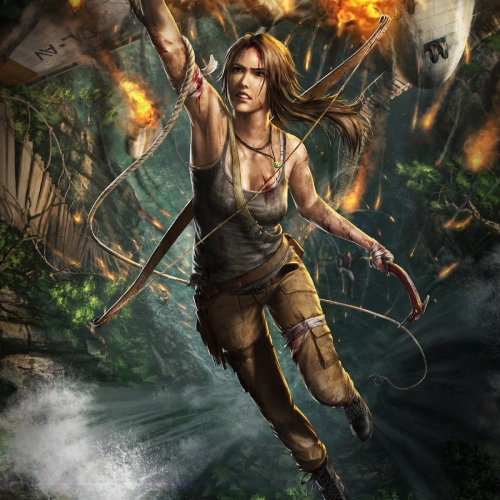
#4 Demon Hunter
This one was the most interesting character design for me. They designed the agile demon hunter with crossbows being used like handguns covered her in full plate while still being able to leap into the air and avoid enemies.. not to mention the glowing demonic eyes.
******************************************************************************
SOME NOTES AND STUFF I LEARNED:
-Realizing how smooth the process for the monk went, I decided that for this 4th piece, I was going to use the same process but with a simpler twist. This time, I will take the line art to a grayscale with values before coloring it. This process will only work on dark scenes and is NOT RECOMMENDED for day time scenes.
-I referenced her pose on various female super heroes being in the air while poised. I thought that it suited this character well; I mean how else will you portray a character with magical hand guns with infinite bullets? (I don’t even know what the quivers are for now) -For her face, I used a lot of faces where I picked up different queues on how to do her emotion and the lighting. This helps you a lot in understanding how to render compared to just copying once reference exactly.
-This piece went on the smoothest because of the process and because monsters are the easiest.
******************************************************************************
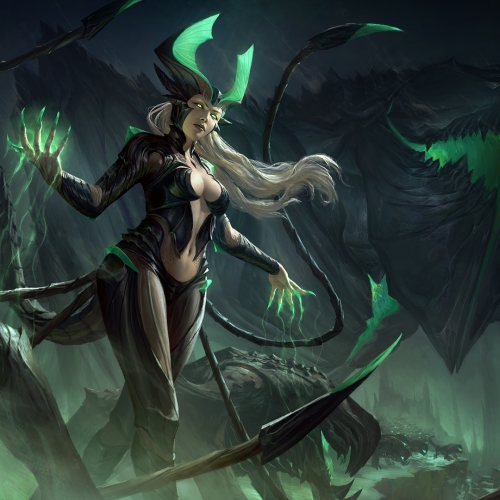
#5 Witch Doctor
The addition of this indigenous themed class with the necromancer-like abilities was very interesting for a mainly gothic themed game.
******************************************************************************
SOME NOTES AND STUFF I LEARNED:
-Since this was also a night piece, I decided to create it in the same process as the demon hunter. This went fairly smooth with a lot of adjustments to get the color right. Replace color is very underestimated I think. It helps me correct the mistakes that occur when you color a gray scaled image.
-Btw, coloring a gray scaled image takes a lot of layers set to hard light for initial color, overlay for additional saturation, and multiply to fix those dead highlights. After that, I paint with normal mode and fix what I can.
-This was very fun to do because I used myself as a reference a lot. All the hands there were directly referenced from my left hand using a mirror and a lamp.
-The two demons behind were blocked in with a wrong proportion which I had to correct at a later stage.
-I think this piece benefitted a lot from the mistakes I made from the previous 4 that this has become one of my favorite illustrations.
******************************************************************************
Thanks for watching! Did each in around 20+ hrs +2hrs of research + 3hrs of facebooking. XD
No more major illustrations for a while. No more fan arts for a while.. I would just focus first on getting my secret stuff started while going back to basics. Time to move on to greater things!


Leave a Reply